1. Google Meet 發起/加入會議
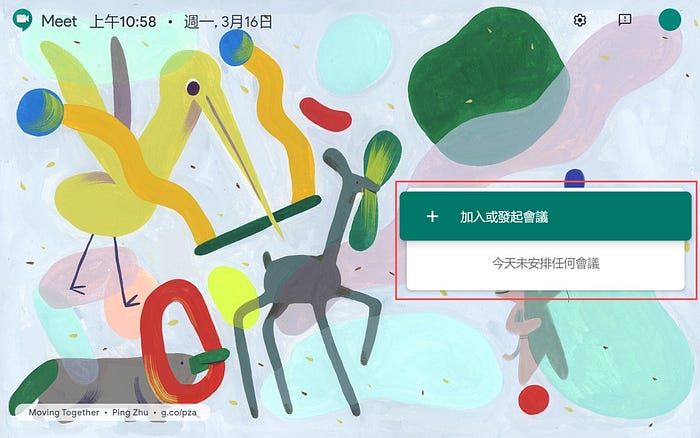
相較於 YouTube 直播,Google Meet 的操作比較平易近人。進入 Google 首頁,點選右上角的九宮格符號,並在選單中選 Meet 的圖示。

進入 Google Meet 首頁後,點選畫面右方的 +加入或發起會議 ,並填入會議名稱,這邊建議可以填入課程及老師的名稱。
進入 Google Meet 同步畫面後,可以看到自己的視訊影像畫面,在畫面下方有麥克風和攝影機的開關,可清楚地知道目前是否已開啟影像或聲音的功能。
點選中間的紅色電話則是結束本次視訊課程或會議。
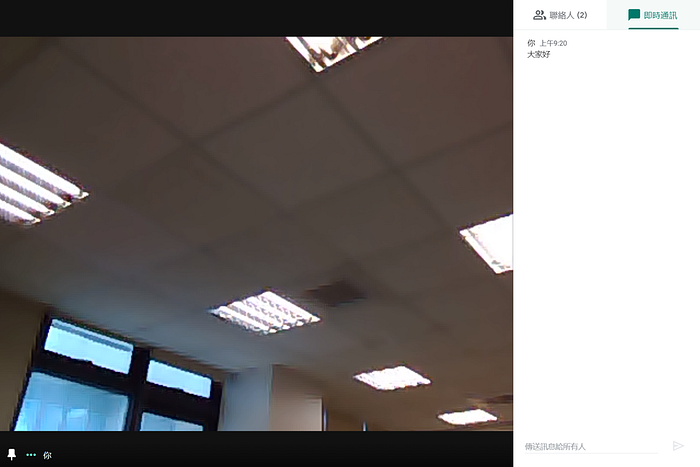
右上角的人像圖示,可以看到每個與會者(學生)的視訊畫面和音訊是否開啟,透過點擊其他人的頭像,可將他的影音畫面切換至主要畫面。訊息的圖示,即可和線上的學生進行文字訊息的討論。
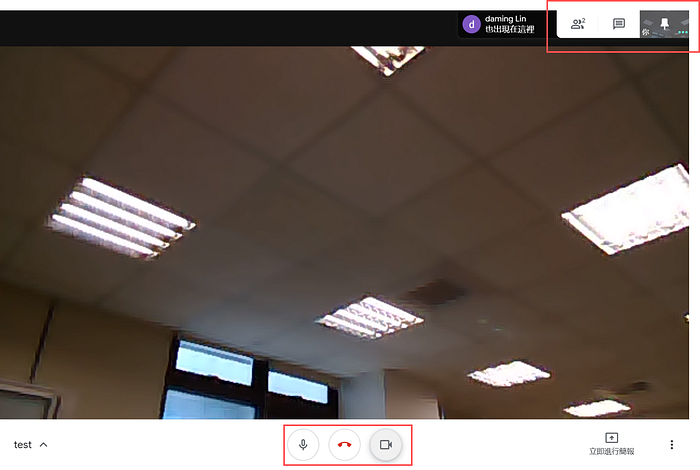

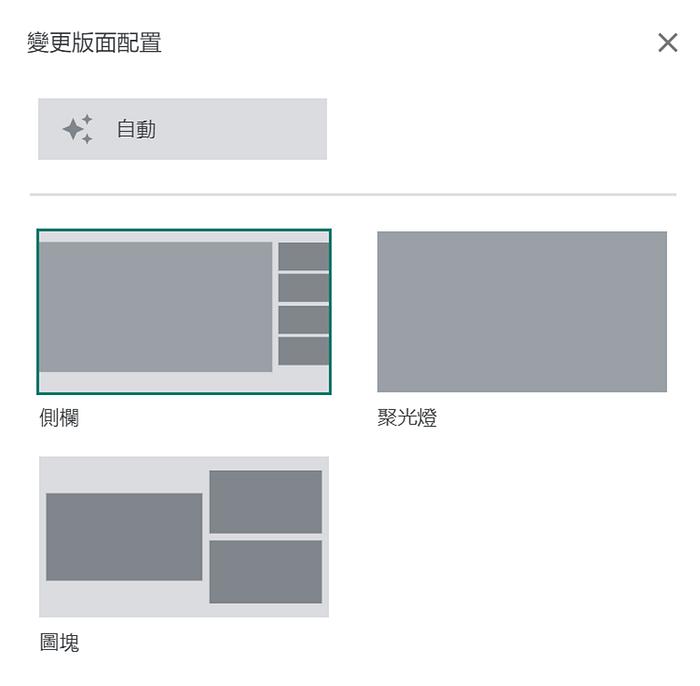
點選右下角三點圖示會出現進階設定選單,點選變更版面配置可以依據您的需求調整主畫面的影像畫面配置大小。

若與會者有需要顯示即時字幕的需求,可點選開啟字幕的功能,但目前僅支援英文字幕。
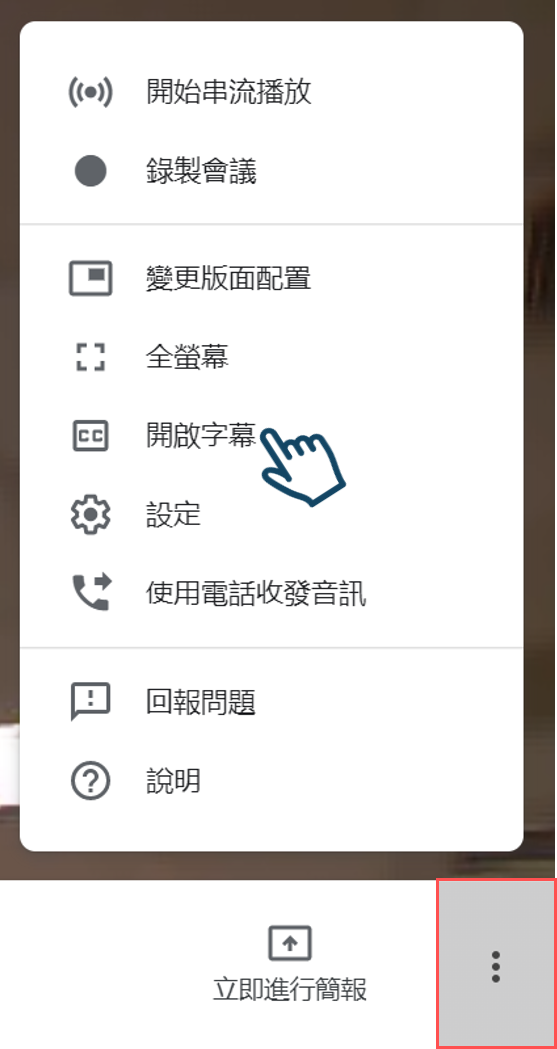
在設定裡面則是可以調整要用的麥克風和攝影機。


2. Google Meet螢幕錄製
若線上課程或會議有錄製影片的需求,可點選右下角三點圖示裡的錄製會議。系統會自動將整堂課的內容錄製下來儲存至主講者的Google雲端硬碟之中。

結束會議或課程時,再點選停止錄製即可暫停錄影。


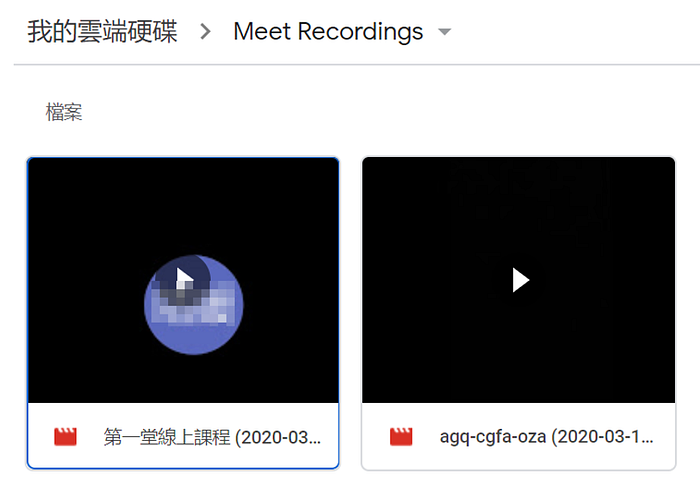
錄製完成的影片會存放在雲端硬碟的Meet Recordings資料夾裡。

3. Google Meet 簡報畫面
若有需要以投影片或是軟體操作等方式來進行課程或會議,可點選右下角立即進行簡報,可以選擇分享您的整個畫面或單個視窗,讓您的畫面顯示在所有人的畫面上。


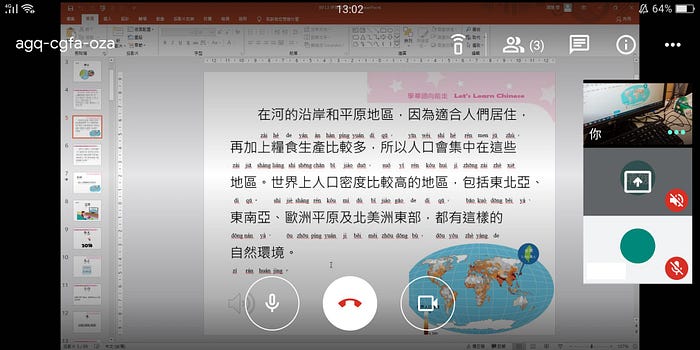
在其他與會者或學生畫面上就會出現主講者(或老師)的簡報畫面和視訊畫面。
學生畫面
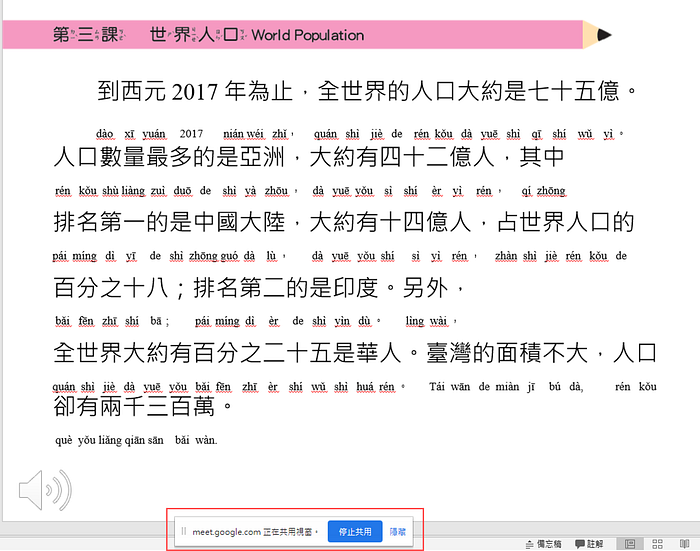
要結束畫面可以點選下方的停止共用。
4. 利用 Google 行事曆安排 Google Meet 線上課程
若需要與其他與會者或學生提早預約線上課程,建議可事先於 Google 行事曆上預約安排線上會議。
首先,開啟 Google 行事曆,接著在要上課的時間點按一下。在跳出的視窗上方填入標題,接著按新增邀請對象。

輸入對方的電子信箱,下方就會出現被邀請的對象。接著點選新增會議(一定要點這個喔)。

會出現加入 Hangouts Meet,最後按下右下角的儲存。
*老師可以給學生會議ID加入課程。如果在沒有網路的地方,亦可透過打電話的方式加入課程進行討論。

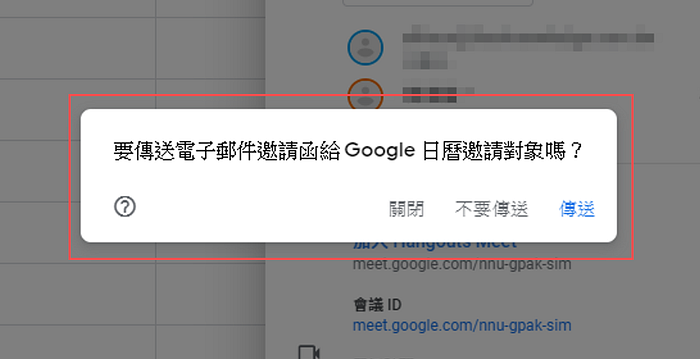
完成預約後,會跳出是否要傳送電子郵件邀請函給邀請對象。可按下傳送,學生則會立刻收到這個線上會議的通知。
一到上課時間,教師和學生只需要點擊行事曆上的該事件,接著按加入 Hangouts Meet 會議就可以開始視訊。
*教師可以在行事曆下方看到邀請對象的參與狀況。

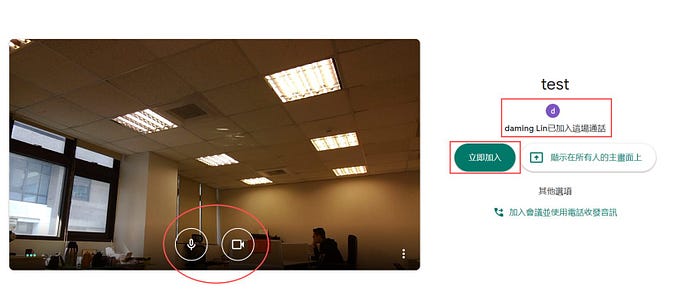
當學生加入 Google Meet 後,在畫面的左邊可以看到麥克風和攝影機的開關,右邊上方可以看到加入通話的成員。按立即加入可以看到所有成員的畫面。
5. 利用 Google 行事曆新增 Google Meet 附件
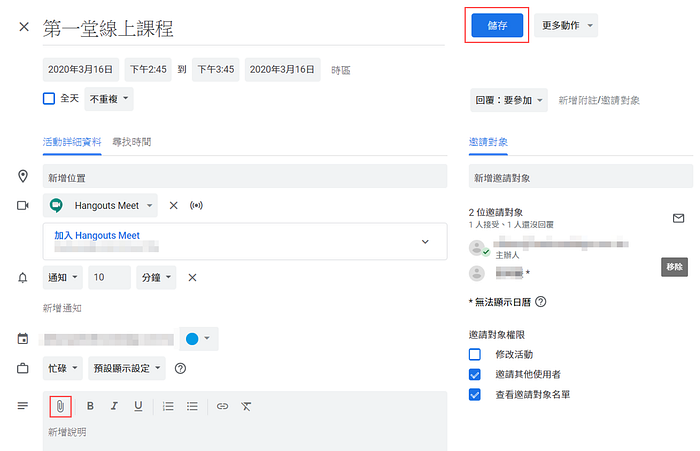
如果主講者或老師想要在這場會議中加入檔案分享的話,可以在 Google 行事曆的事件中按右上角的鉛筆圖示進入編輯畫面,然後點左下角迴紋針圖示,可以上傳 Google 雲端裡的檔案,再按儲存。

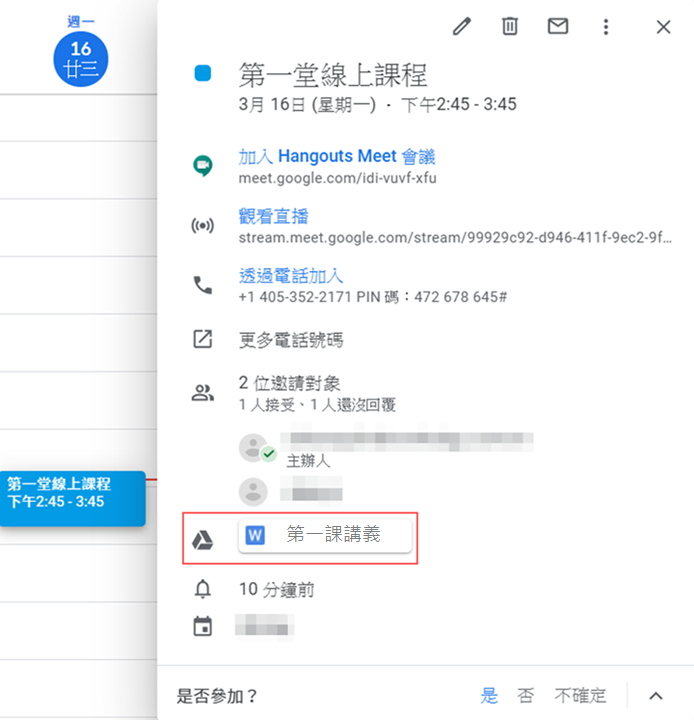
在Google Meet的課程進行時,其他參與者就可以透過點選左下角的課程名稱下載相關的課程附件。

6. 利用 Google 行事曆開起 Google Meet 串流直播
若老師在使用同步教學上,是開設大班課或是無須學生操作互動功能的課程,建議也可使用Google Meet的串流直播功能。
在Google行事曆的事件當中,在Hangouts Meet的下拉選單中點最後一個新增直播,會出現一個直播網址,只要將直播網只提供給其他與會者即可進入觀看直播的畫面。
*此功能只有教師可發言,學生也只能看到教師的畫面。


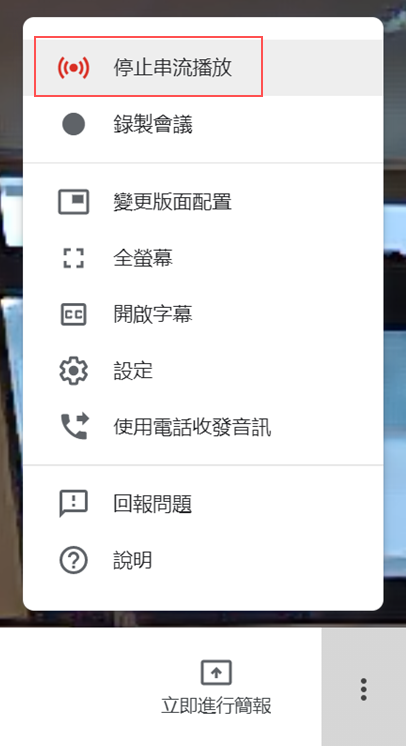
接著主講者在Google Meet右下角的進階設定裡,點選開始串流播放,即可進行直播。

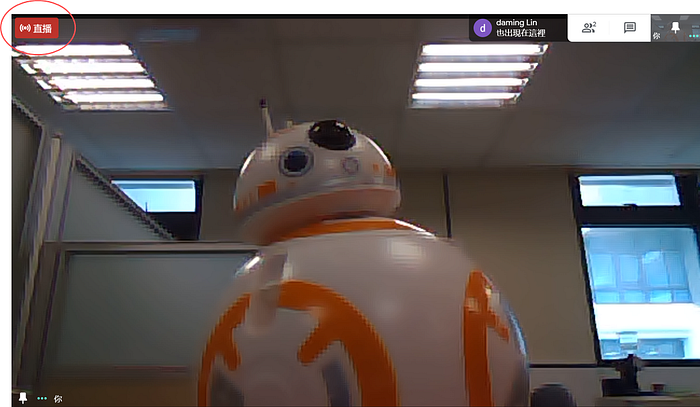
老師的直播畫面左上角會顯示直播的字樣。
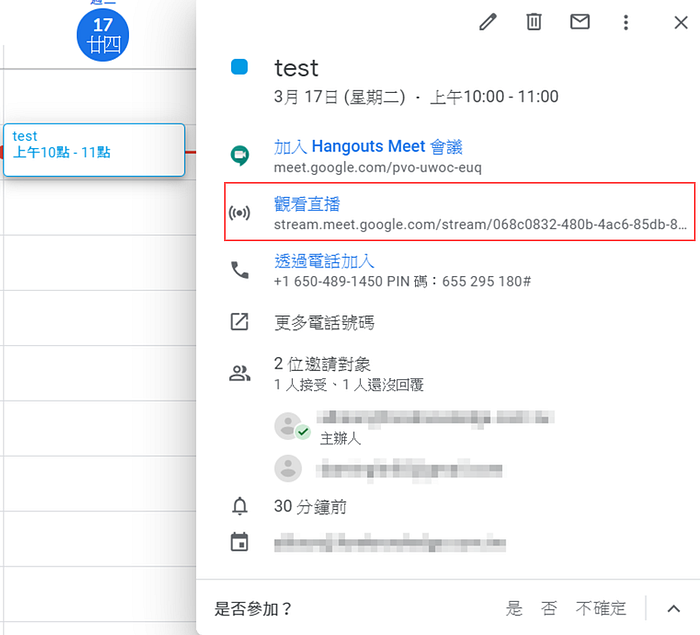
學生也可以透過Google行事曆點選觀看直播進入。
學生畫面
結束課程時,老師再點選一次進階設定裡的停止串流播放,即可結束直播。
因應疫情的關係,在2020年7月1日前可以免費使用Google Meet的付費功能,包括:
- 最多可供 250 位參與者同時加入通話 (2020/7/1之後恢復成100位參與者)
- 使用直播功能,最多可供您網域內的 100,000 名觀眾同步觀看 (2020/7/1之後則無法免費使用此功能)